CN8601上线有一段时间了,目前还是二选一的情况,虽然能做双守,但是只能一个46001,一个86001,没法听其他频道,为了省一张TF卡(主要插拔卡太烦),调查了一番,做了单张卡的多系统启动,并做了网页切换功能。
系统依然推荐pi-star,所以例子我按pi-star写。这里再强调一下,pi-star有只读模式,对于tf卡寿命以及盒子系统稳定性有非常大的提升。
由于该操作过于复杂,我做了镜像,不想自己制作的小伙伴可以直接下载img镜像直接写盘就可以,然后到网页后台,配置-电源选项中就可以切换BM4602和CN8601。
链接: https://pan.baidu.com/s/1v5P9e25fcA79tui1zjsuXw (已被和谐。。。)https://pan.quark.cn/s/b6677ef18926 https://wwav.lanzouw.com/b014wql20d
里面有2个镜像:
1、纯净pi-star双系统
2、已经配置好所有配置的pi-star双系统
以下是详细的制作过程:
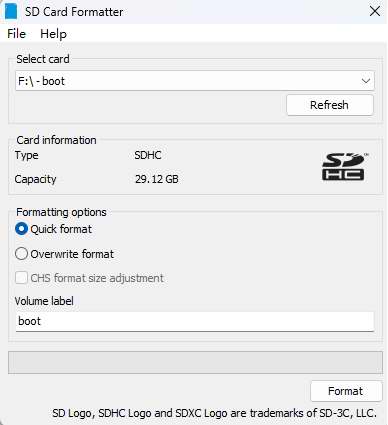
1.格式化tf卡
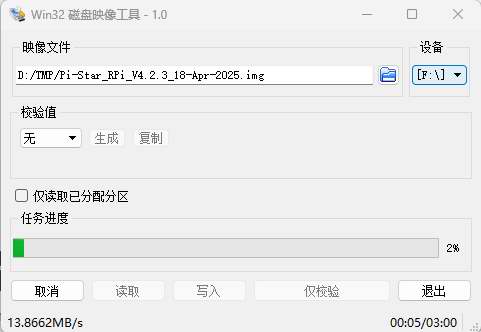
2.写入pi-star镜像
3.配置wifi和基础配置 此处略,不会的看我blog的另一篇文章哈
用途是等下复制pi-star的时候不用重复配置wifi和基础配置了
4.给TF卡分区 这里开始就是本文的重点了,由于windows下没有免费的可以无损给linux系统分区调整大小的软件,再加上大部分HAM都没有Linux系统的电脑,这里我们网上下载一个gparted的livecd的iso,然后用Ventoy引导即可
首先没做过Ventoy启动U盘的可以自行百度(大致方法就是下载Ventoy软件,找个空U盘一路下一步写入)
接着下载gparted的livecd
https://sourceforge.net/projects/gparted/files/gparted-live-stable/
到这里选一个最新的下载即可,我今天下载的是,这个版本无所谓的
https://downloads.sourceforge.net/gparted/gparted-live-1.7.0-8-amd64.iso
讲iso文件拷贝到前面刚做好的U盘中
U盘插入电脑,重启电脑开机按热键进入启动项,选择U盘启动(通常是F12,F11,F10,F8等等,自行百度)
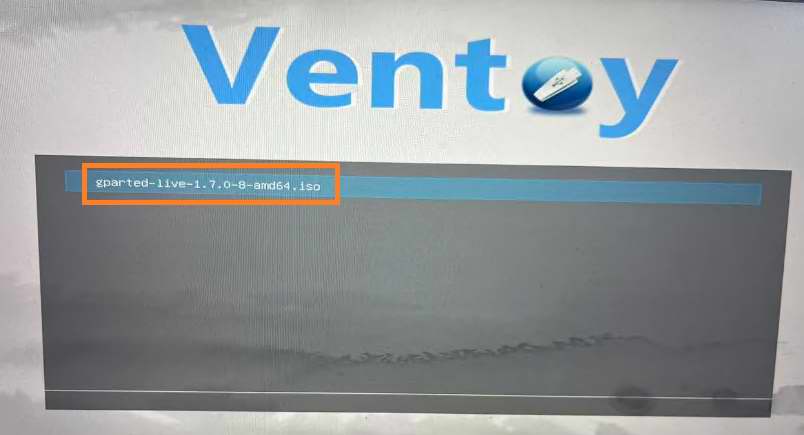
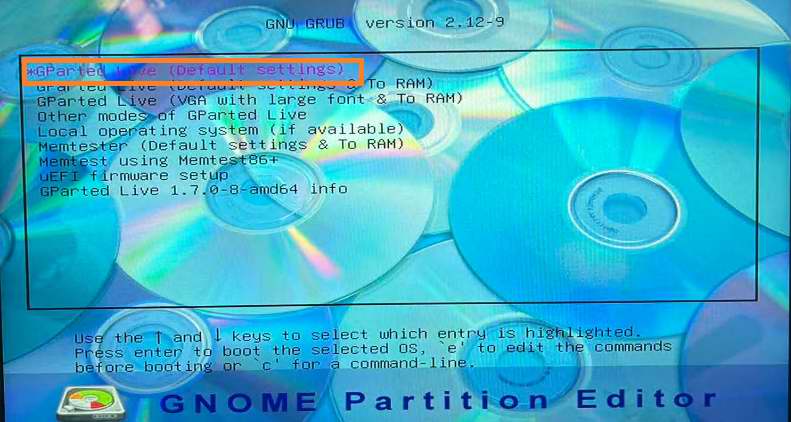
进入到Ventoy启动菜单,选择gparted-live开头的iso文件,回车
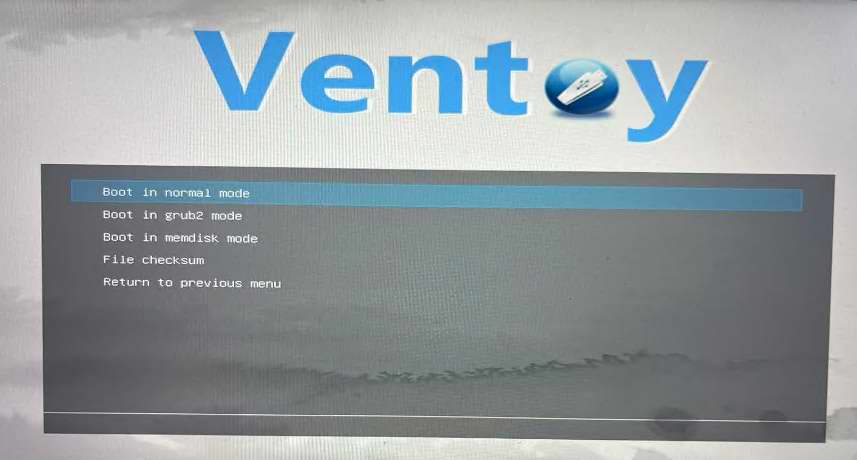
直接回车,选普通模式启动
继续回车,选择第一项图形界面
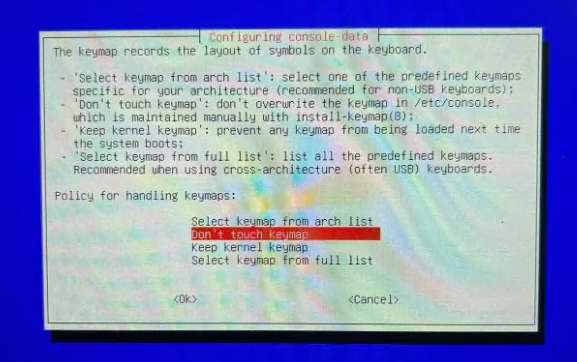
这里继续回车,选择不修改键盘布局
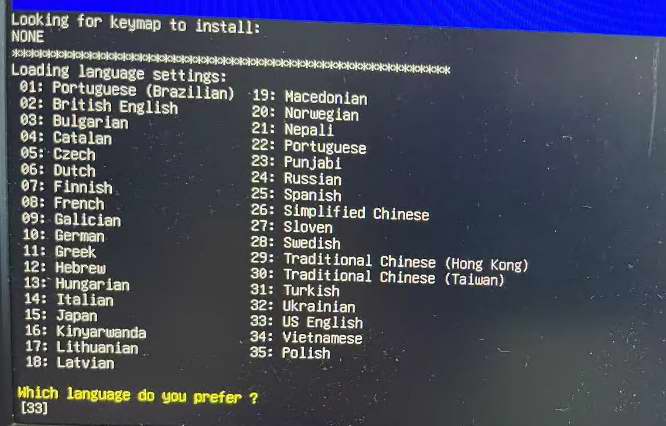
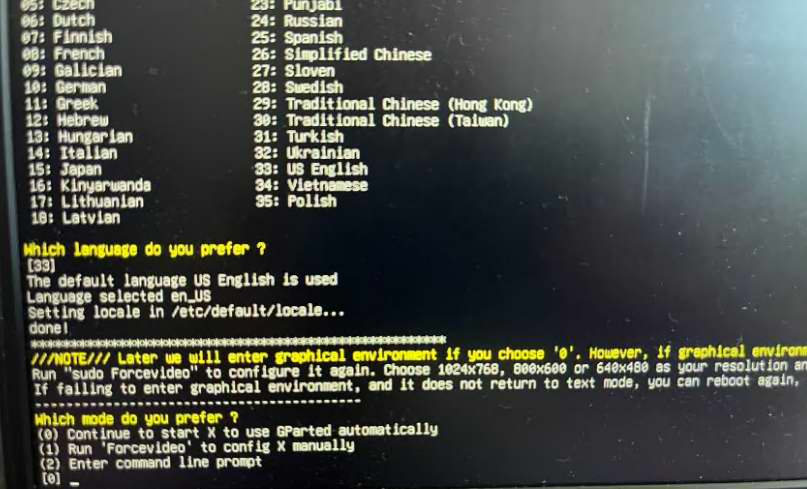
继续回车,选择默认英文
继续回车,自动模式
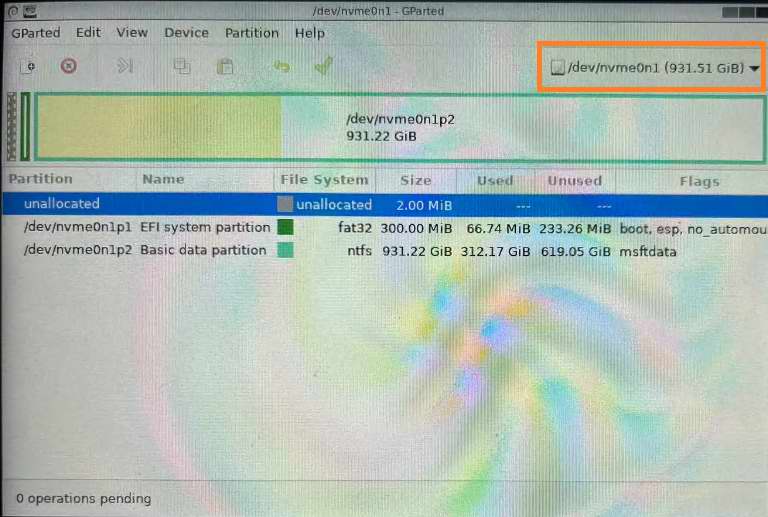
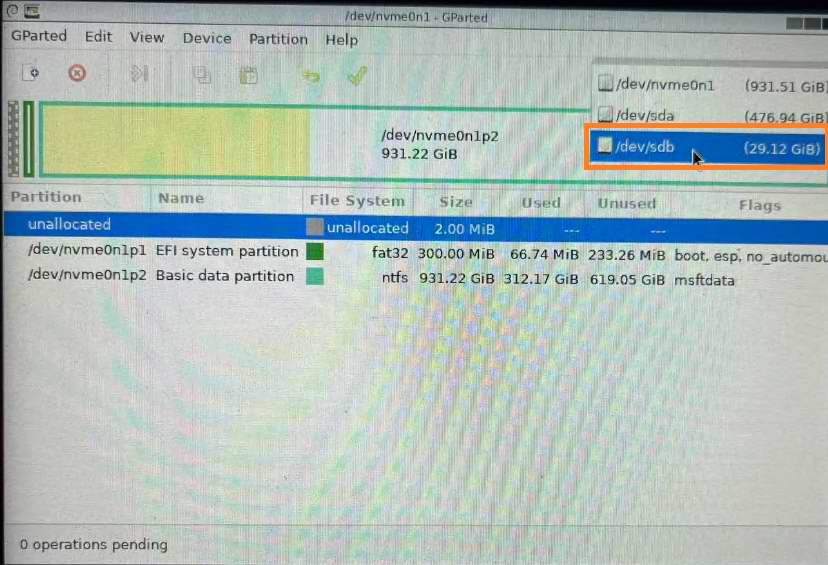
等待一会,进入Gparted程序界面,先在右上角点击硬盘/U盘菜单
这里选择32G的这个TF卡
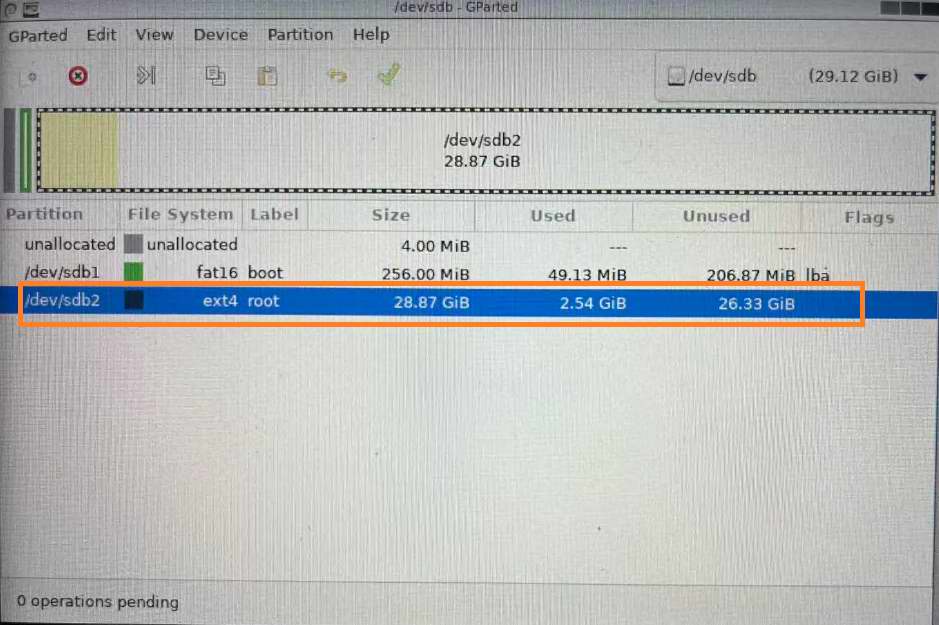
这里可以看到两个分区,sdb1是boot分区,sdb2是root分区
我们在sdb2上点击右键,选择“Resize/Move”调整分区大小
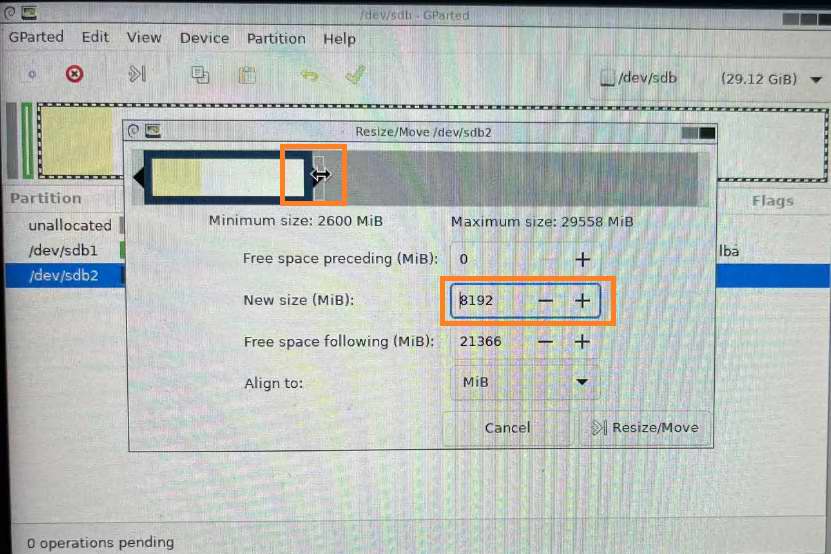
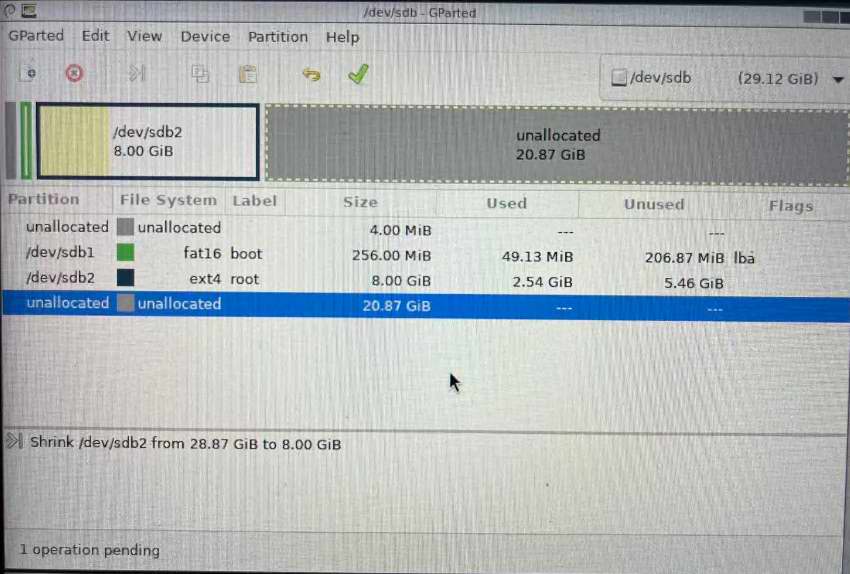
为了区分方便,我调整大小为8192M,也就是8G,之后的分区都做成不一样的,点击右下角的“Resize/Move”
这里可以看到分区缩小到8G,还有个20.87G的空白分区
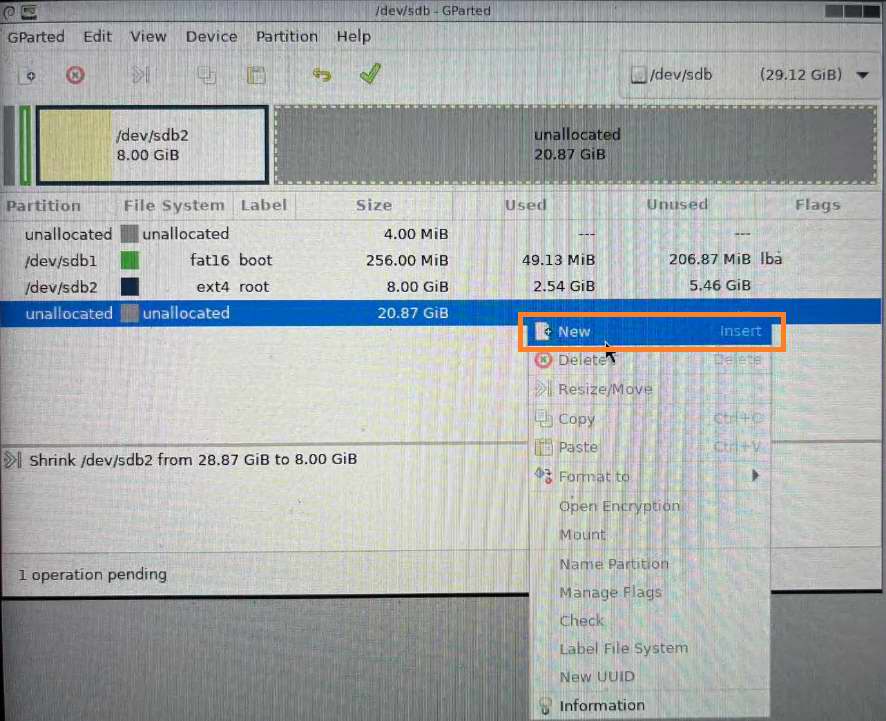
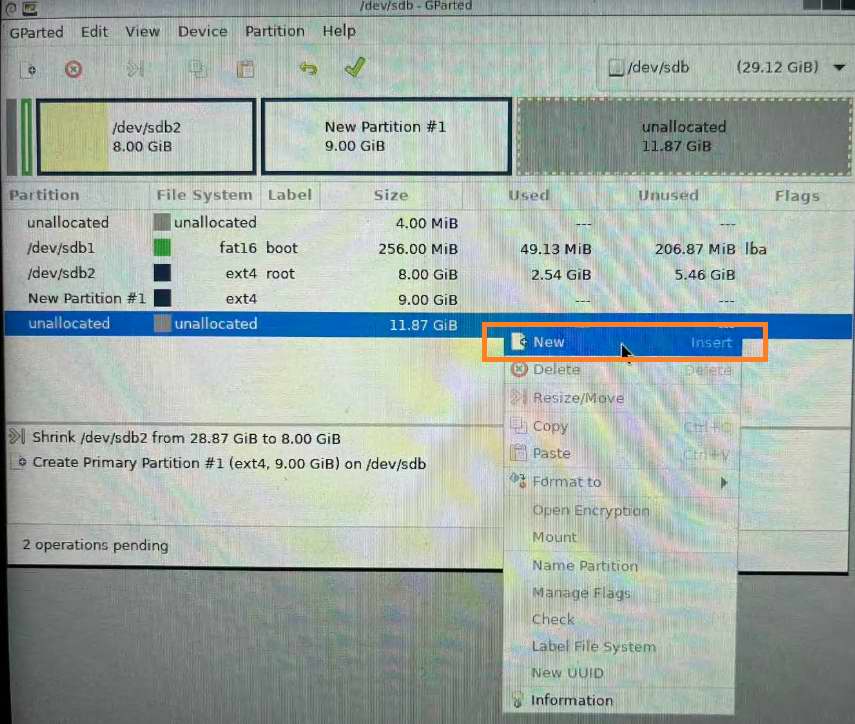
这里在未分配空间继续右键“New”新建分区
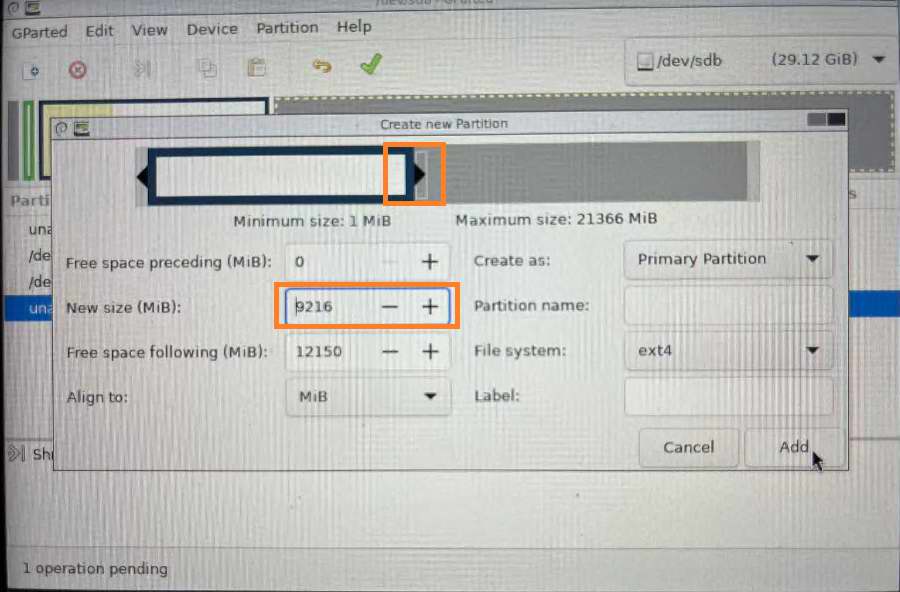
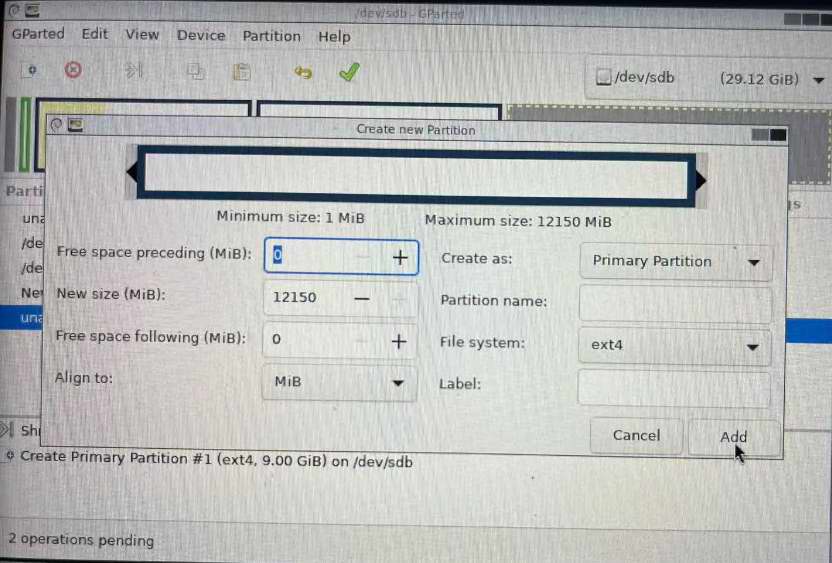
这里拖动上面的框,或者中间直接输入大小,我这里选择输入9216M,也就是9G大小,点“Add”
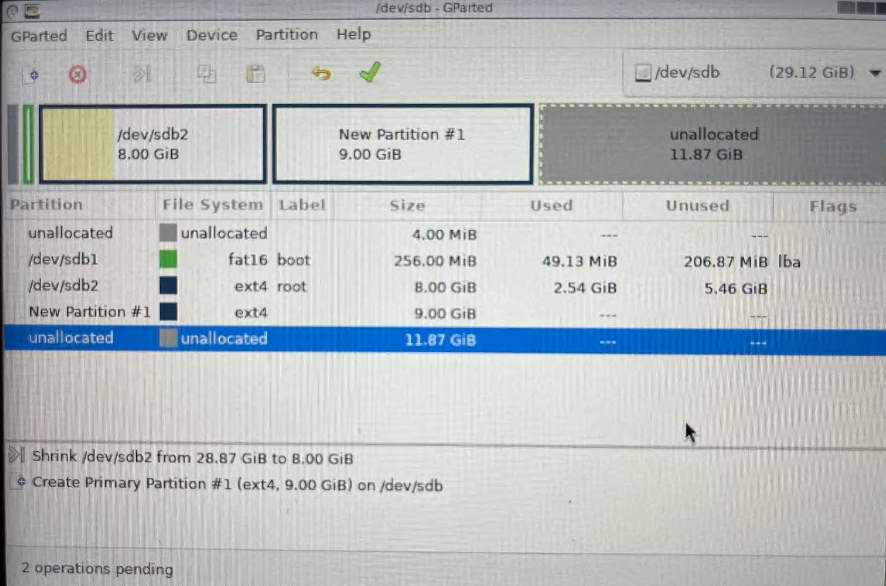
这个9G分区创建完毕
继续在未分配空间右键点击“New”
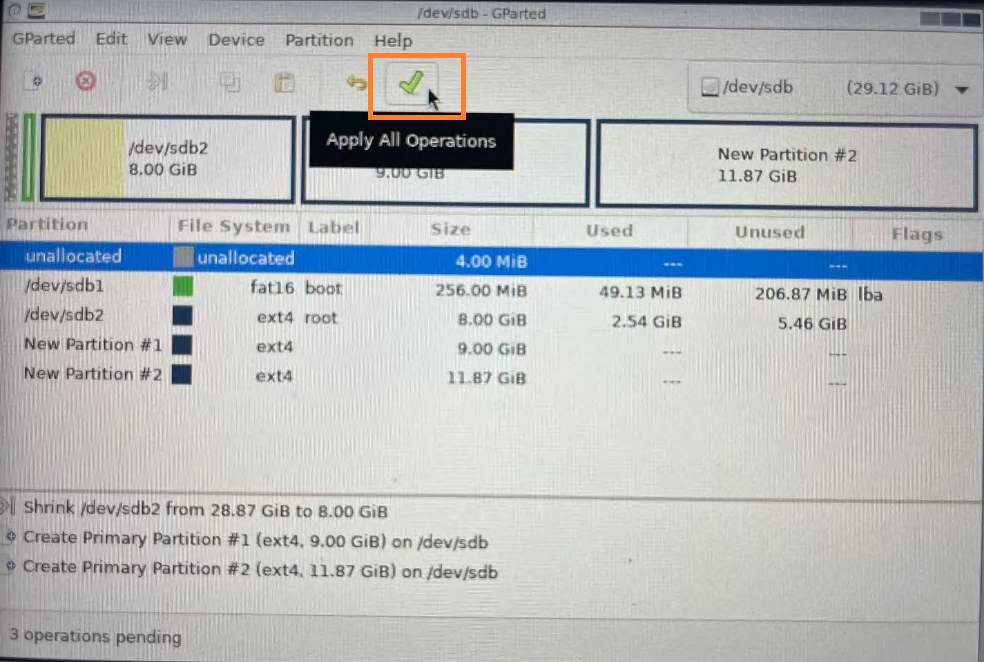
这里由于我们只分3个去,直接点击“Add”即可,如果你需要创建更多的分区也可以在这里继续创建
创建完毕,点击上面绿色小对勾
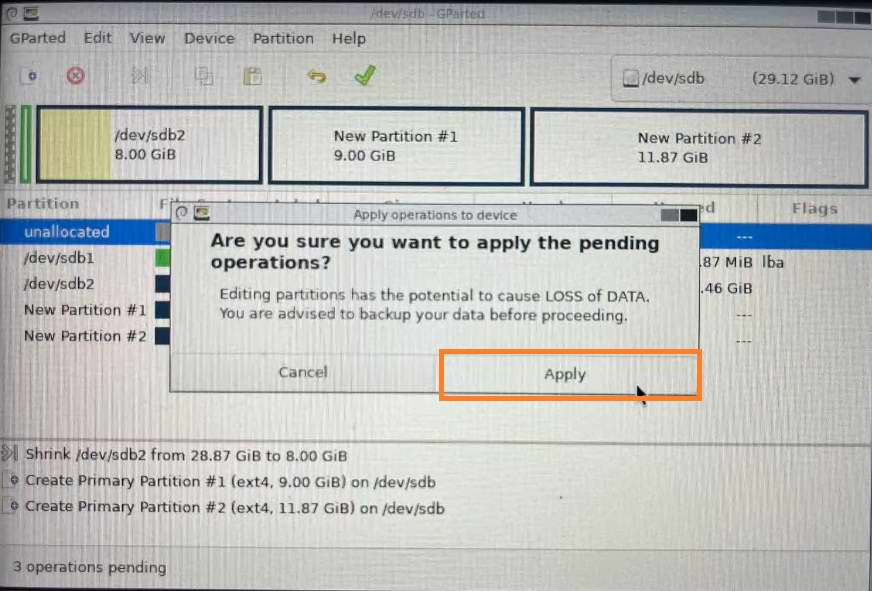
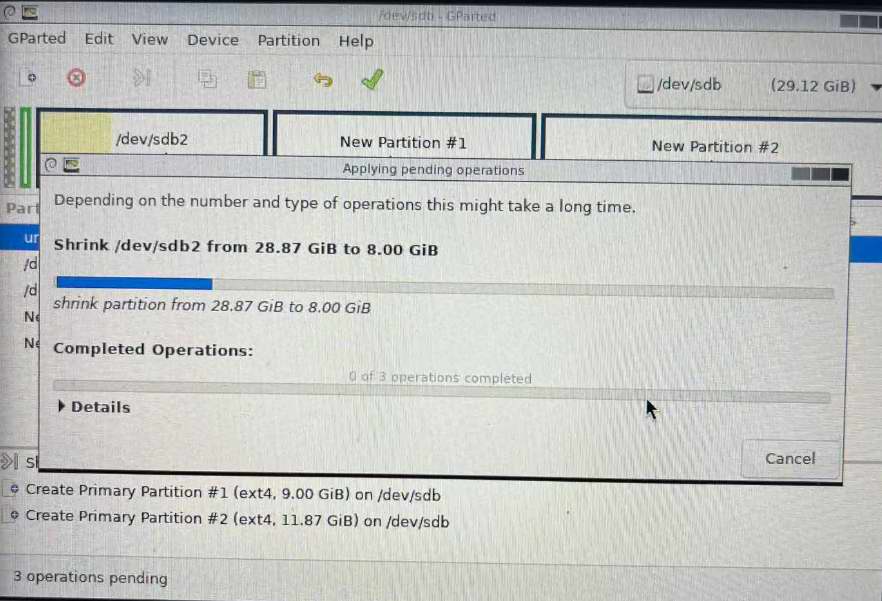
点击“Apply”确定更改
稍等程序执行
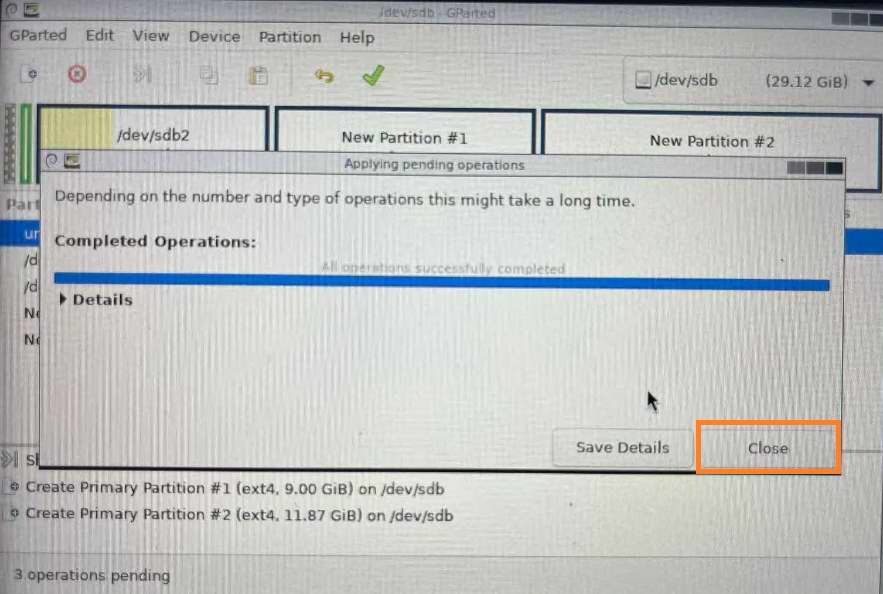
完成后,点击“Close”
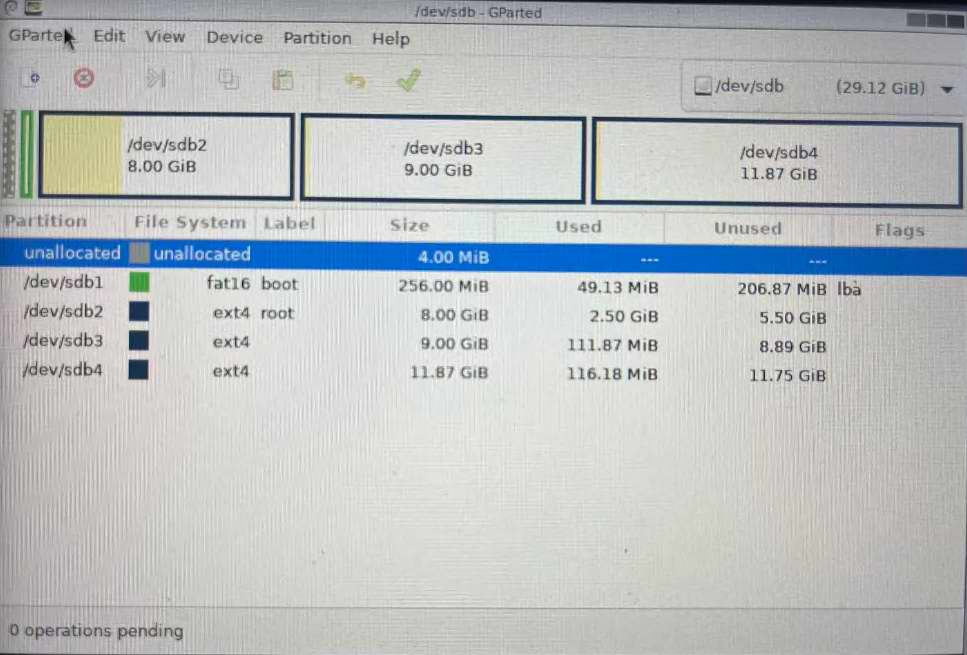
这里可以看到缩小的sdb2,和新创建的sdb3和sdb4,点击左上角“Gparted”菜单
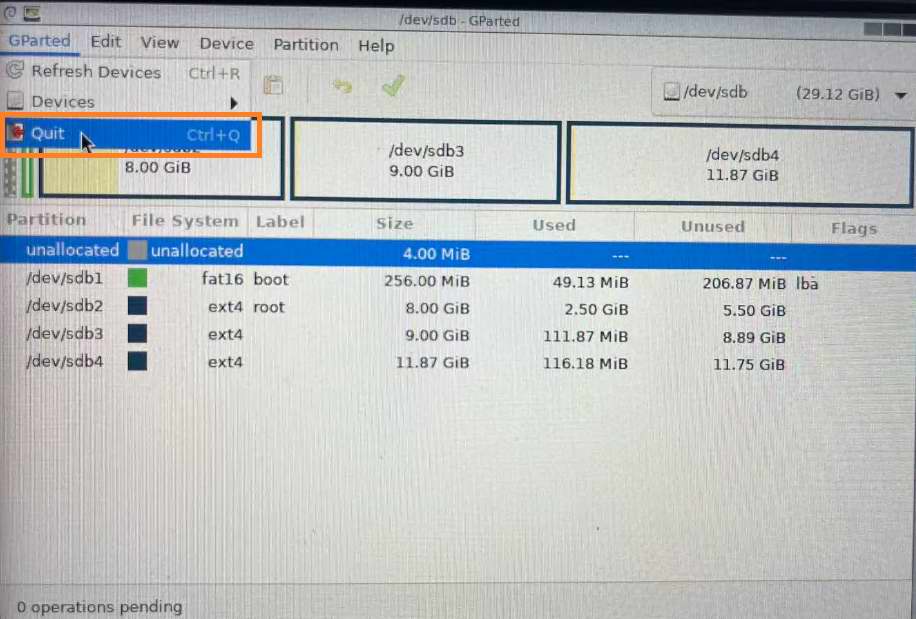
选择‘Quit’退出软件
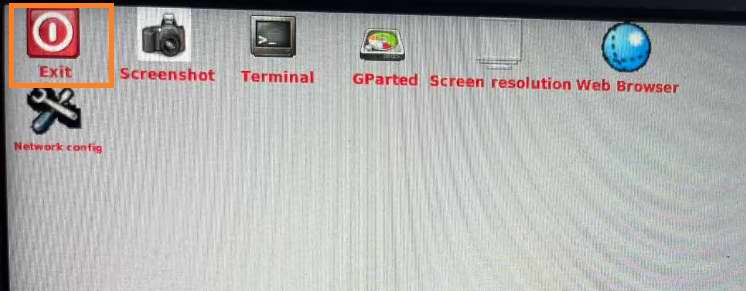
继续双击“Exit”退出当前系统
点击“OK”选择重启计算机
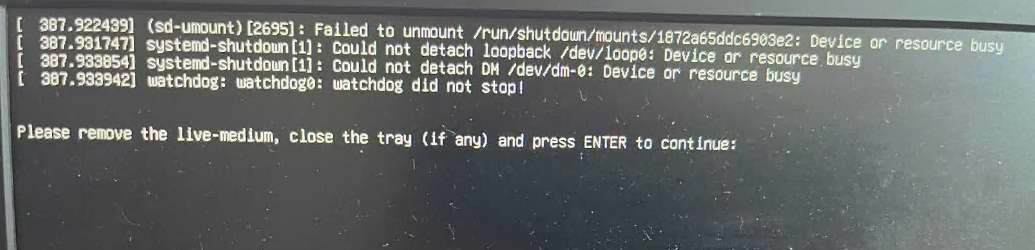
这里拔掉U盘后直接按回车重启电脑
这个时候分区分好了,我们拔出TF卡,插回树莓派,接通树莓派电源
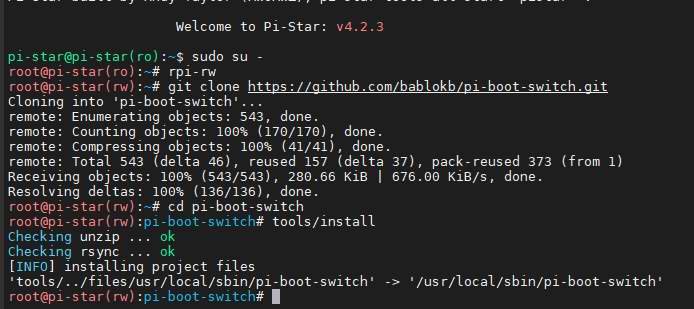
5.安装pi-boot-switch软件并复制系统 首先ssh登录树莓派,输入如下命令安装软件
1
2
3
4
5
sudo su - rpi-rw git clone https://github.com/bablokb/pi-boot-switch.git cd pi-boot-switch tools/install
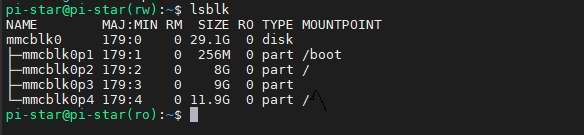
接着输入lsblk查看一下分区名称,这里第二个系统分区为mmcblk0p3,第三个系统分区为mmcblk0p4
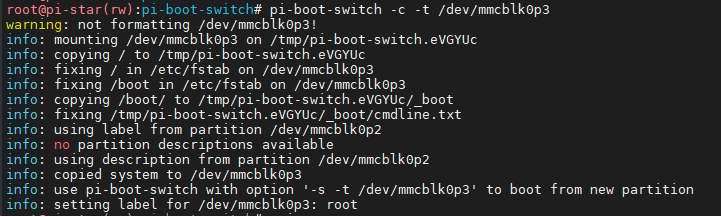
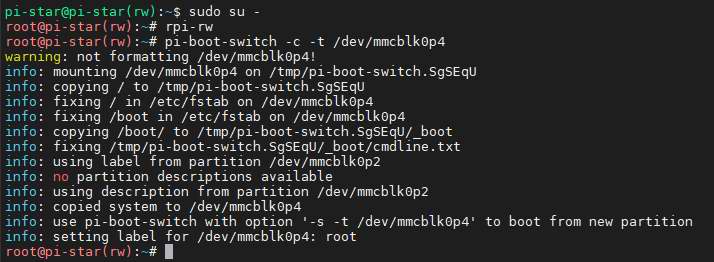
输入命令拷贝系统2和系统3(系统1是源系统,目的为备份用,万一系统2和3玩坏了,可以直接覆盖文件或重新拷贝)
1
2
pi-boot-switch -c -t /dev/mmcblk0p3 pi-boot-switch -c -t /dev/mmcblk0p4
切记复制系统很慢,可能系统会再次恢复为只读,需要重新输入rpi-rw讲硬盘设置为可读写
6.命令行切换系统 命令行方式切换系统1命令如下
1 pi-boot-switch -s -R -t /dev/mmcblk0p3
命令行方式切换系统2命令如下
1 pi-boot-switch -s -R -t /dev/mmcblk0p3
命令行方式切换系统3命令如下
1 pi-boot-switch -s -R -t /dev/mmcblk0p3
7.网页切换系统 为了便于新手和将来打包镜像发布,我又做了网页切换,首先制作3个切换系统的脚本
1
2
3
4
5
6
7
8
9
10
11
12
13
14
15
16
17
18
19
20
vi /home/pi-star/switch2.sh #!/bin/bash mount -o remount,rw / mount -o remount,rw /boot pi-boot-switch -s -R -t /dev/mmcblk0p2 vi /home/pi-star/switch3.sh #!/bin/bash mount -o remount,rw / mount -o remount,rw /boot pi-boot-switch -s -R -t /dev/mmcblk0p3 vi /home/pi-star/switch4.sh #!/bin/bash mount -o remount,rw / mount -o remount,rw /boot pi-boot-switch -s -R -t /dev/mmcblk0p4
赋予脚本执行权限
1
2
3
chmod +x /home/pi-star/switch2.sh chmod +x /home/pi-star/switch3.sh chmod +x /home/pi-star/switch4.sh
编辑网页文件/var/www/dashboard/admin/power.php (直接覆盖以下内容即可)
1
2
3
4
5
6
7
8
9
10
11
12
13
14
15
16
17
18
19
20
21
22
23
24
25
26
27
28
29
30
31
32
33
34
35
36
37
38
39
40
41
42
43
44
45
46
47
48
49
50
51
52
53
54
55
56
57
58
59
60
61
62
63
64
65
66
67
68
69
70
71
72
73
74
75
76
77
78
79
80
81
82
83
84
85
86
87
88
89
90
91
92
93
94
95
96
97
98
99
100
101
102
103
104
105
106
107
108
109
110
111
112
113
114
115
116
117
118
119
120
121
122
123
124
125
126
127
128
129
130
131
132
133
134
135
136
137
138
139
140
141
142
143
144
145
146
147
148
149
150
151
<?php // Load the language support require_once('config/language.php'); // Load the Pi-Star Release file $pistarReleaseConfig = '/etc/pistar-release'; $configPistarRelease = array(); $configPistarRelease = parse_ini_file($pistarReleaseConfig, true); // Load the Version Info require_once('config/version.php'); // Sanity Check that this file has been opened correctly if ($_SERVER["PHP_SELF"] == "/admin/power.php") { // Sanity Check Passed. header('Cache-Control: no-cache'); session_start(); ?> <!DOCTYPE html PUBLIC "-//W3C//DTD XHTML 1.0 Transitional//EN" "http://www.w3.org/TR/xhtml1/DTD/xhtml1-transitional.dtd"> <html xmlns="http://www.w3.org/1999/xhtml" xmlns:v="urn:schemas-microsoft-com:vml" lang="en"> <head> <meta name="robots" content="index" /> <meta name="robots" content="follow" /> <meta name="language" content="English" /> <meta http-equiv="Content-Type" content="text/html; charset=iso-8859-1" /> <meta name="Author" content="Andrew Taylor (MW0MWZ)" /> <meta name="Description" content="Pi-Star Power" /> <meta name="KeyWords" content="Pi-Star" /> <meta http-equiv="Cache-Control" content="no-cache, no-store, must-revalidate" /> <meta http-equiv="pragma" content="no-cache" /> <link rel="shortcut icon" href="images/favicon.ico" type="image/x-icon" /> <meta http-equiv="Expires" content="0" /> <title>Pi-Star - <?php echo $lang['digital_voice']." ".$lang['dashboard']." - ".$lang['power'];?></title> <link rel="stylesheet" type="text/css" href="css/pistar-css.php" /> </head> <body> <div class="container"> <div class="header"> <div style="font-size: 8px; text-align: right; padding-right: 8px;">Pi-Star:<?php echo $configPistarRelease['Pi-Star']['Version']?> / <?php echo $lang['dashboard'].": ".$version; ?></div> <h1>Pi-Star <?php echo $lang['digital_voice']." - ".$lang['power'];?></h1> <p style="padding-right: 5px; text-align: right; color: #ffffff;"> <a href="/" style="color: #ffffff;"><?php echo $lang['dashboard'];?></a> | <a href="/admin/" style="color: #ffffff;"><?php echo $lang['admin'];?></a> | <a href="/admin/update.php" style="color: #ffffff;"><?php echo $lang['update'];?></a> | <a href="/admin/config_backup.php" style="color: #ffffff;"><?php echo $lang['backup_restore'];?></a> | <a href="/admin/configure.php" style="color: #ffffff;"><?php echo $lang['configuration'];?></a> </p> </div> <div class="contentwide"> <?php if (!empty($_POST)) { ?> <table width="100%"> <tr><th colspan="2"><?php echo $lang['power'];?></th></tr> <?php if ( escapeshellcmd($_POST["action"]) == "reboot" ) { echo '<tr><td colspan="2" style="background: #000000; color: #00ff00;"><br /><br />Reboot command has been sent to your Pi, <br />please wait up to 90 secs for it to reboot.<br /> <br />You will be re-directed back to the <br />dashboard automatically in 90 seconds.<br /><br /><br /> <script language="JavaScript" type="text/javascript"> setTimeout("location.href = \'/index.php\'",90000); </script> </td></tr>'; system('sudo sync && sudo sync && sudo sync && sudo mount -o remount,ro / > /dev/null &'); exec('sudo reboot > /dev/null &'); }; if ( escapeshellcmd($_POST["action"]) == "shutdown" ) { echo '<tr><td colspan="2" style="background: #000000; color: #00ff00;"><br /><br />Shutdown command has been sent to your Pi, <br /> please wait 30 secs for it to fully shutdown<br />before removing the power.<br /><br /><br /></td></tr>'; system('sudo sync && sudo sync && sudo sync && sudo mount -o remount,ro / > /dev/null &'); exec('sudo shutdown -h now > /dev/null &'); }; if ( escapeshellcmd($_POST["action"]) == "reboot2" ) { echo '<tr><td colspan="2" style="background: #000000; color: #00ff00;"><br /><br />Reboot command has been sent to your Pi, <br />please wait up to 90 secs for it to reboot.<br /> <br />You will be re-directed back to the <br />dashboard automatically in 90 seconds.<br /><br /><br /> <script language="JavaScript" type="text/javascript"> setTimeout("location.href = \'/index.php\'",90000); </script> </td></tr>'; system('sudo sync && sudo sync && sudo sync && sudo mount -o remount,ro / > /dev/null &'); exec('sudo /bin/sh /home/pi-star/switch2.sh && sudo reboot > /dev/null &'); }; if ( escapeshellcmd($_POST["action"]) == "reboot3" ) { echo '<tr><td colspan="2" style="background: #000000; color: #00ff00;"><br /><br />Reboot command has been sent to your Pi, <br />please wait up to 90 secs for it to reboot.<br /> <br />You will be re-directed back to the <br />dashboard automatically in 90 seconds.<br /><br /><br /> <script language="JavaScript" type="text/javascript"> setTimeout("location.href = \'/index.php\'",90000); </script> </td></tr>'; system('sudo sync && sudo sync && sudo sync && sudo mount -o remount,ro / > /dev/null &'); exec('sudo /bin/sh /home/pi-star/switch3.sh && sudo reboot > /dev/null &'); }; if ( escapeshellcmd($_POST["action"]) == "reboot4" ) { echo '<tr><td colspan="2" style="background: #000000; color: #00ff00;"><br /><br />Reboot command has been sent to your Pi, <br />please wait up to 90 secs for it to reboot.<br /> <br />You will be re-directed back to the <br />dashboard automatically in 90 seconds.<br /><br /><br /> <script language="JavaScript" type="text/javascript"> setTimeout("location.href = \'/index.php\'",90000); </script> </td></tr>'; system('sudo sync && sudo sync && sudo sync && sudo mount -o remount,ro / > /dev/null &'); exec('sudo /bin/sh /home/pi-star/switch4.sh && sudo reboot > /dev/null &'); }; ?> </table> <?php } else { ?> <form action="<?php echo htmlspecialchars($_SERVER["PHP_SELF"]); ?>" method="post" onsubmit="return confirm('Are you sure?');"> <table width="100%"> <tr> <th colspan="2"><?php echo $lang['power'];?></th> </tr> <tr> <td align="center"> Reboot<br /> <button style="border: none; background: none;" name="action" value="reboot"><img src="/images/reboot.png" border="0" alt="Reboot" /></button> </td> <td align="center"> Shutdown<br /> <button style="border: none; background: none;" name="action" value="shutdown"><img src="/images/shutdown.png" border="0" alt="Shutdown" /></button> </td> </tr> <tr> <td align="center"> Reboot BM4602<br /> <button style="border: none; background: none;" name="action" value="reboot3"><img src="/images/reboot.png" border="0" alt="Reboot BM4602" /></button> </td> <td align="center"> Reboot CN8601<br /> <button style="border: none; background: none;" name="action" value="reboot4"><img src="/images/reboot.png" border="0" alt="Reboot CN8601" /></button> </td> </tr> </table> </form> <?php } ?> </div> <div class="footer"> Pi-Star web config, © Andy Taylor (MW0MWZ) 2014-<?php echo date("Y"); ?>.<br /> Need help? Click <a style="color: #ffffff;" href="https://www.facebook.com/groups/pistarusergroup/" target="_new">here for the Support Group</a><br /> Get your copy of Pi-Star from <a style="color: #ffffff;" href="http://www.pistar.uk/downloads/" target="_blank">here</a>.<br /> <br /> </div> </div> </body> </html> <?php } ?>
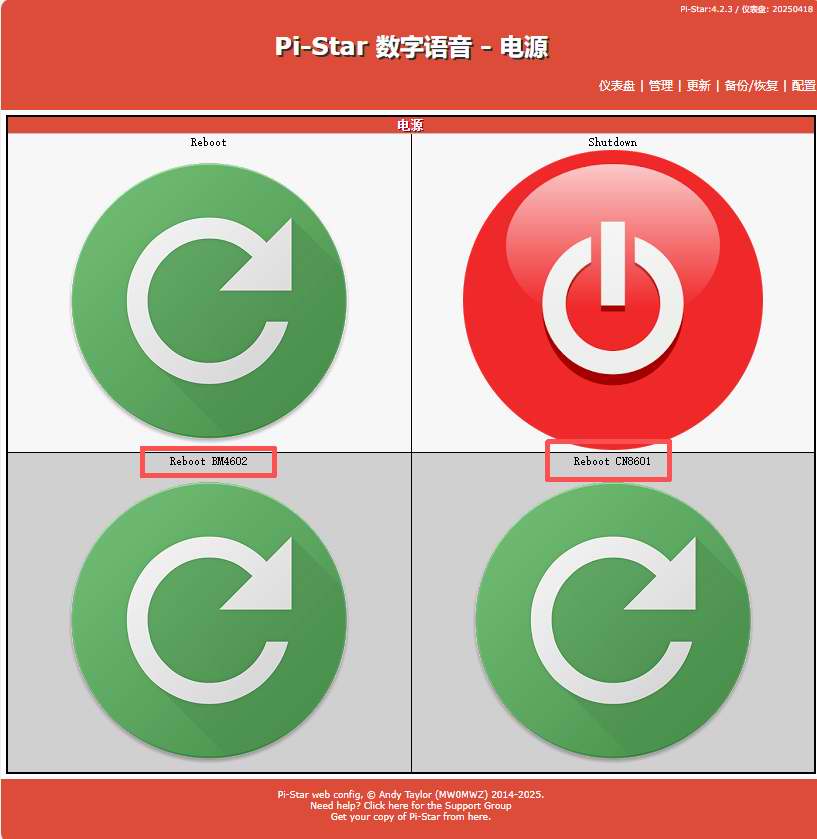
修改之后,进入仪表板,点击“电源”
在电源菜单下面就可以看到多出来的2个菜单,一个进入BM4602,一个进入CN8601
之后就可以愉快的玩耍了。
下一步计划考虑做屏幕固件切换,等有时间再做:)